how to install baby gate
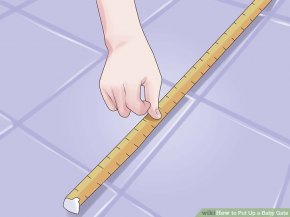
 Measure the area. Pressure fit gates can be installed easily without any special tools, but they do require rigid, sturdy, flat surfaces on both sides for secure attachment. They are a great choice for doorways and door frames. You’ll need the correct dimensions to make sure your gate will fit properly, though, so first measure the area where you want to install it.
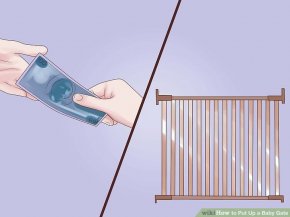
- Purchase the appropriately-sized gate. Pressure fit gates come in various sizes and styles. Choose one that fits your measurements and suits your home’s style.
- For maximum safety, check to make sure that the baby gate you purchase is certified by your local children’s product safety organization. In the United States, for example, check for certification from the Juvenile Products Manufacturers Association (the JPMA).
Read the manufacturer’s instructions. Before you install the gate, read the manual and make sure you follow the manufacturer’s specific directions. The details of the installation procedure may vary slightly from one brand to another.
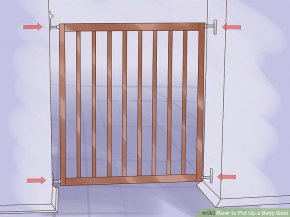
- Mount the gate in the desired location. Attach the gate to a sturdy, flat wall or frame on both sides.
- Most gates have soft pads designed to protect your walls or door frames. This will keep the gate from scratching paints and finishes.
Check the gate regularly. Every day, make sure that the mounting system is still secure and that the gate seems to be in good condition. Adjust as necessary. If you notice any problems with the gate, contact that manufacturer.
Method 2
Installing a Hardware Mounted Baby Gate

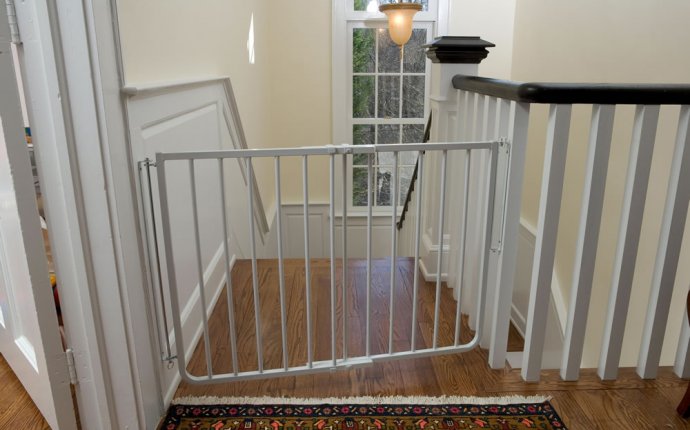
- Measure the area. Hardware mounted gates may require tools for installation, but they are very sturdy and perfect for staircases and other dangerous areas. Exact measurements are important, though. Measure the gap between the surfaces where you plan to attach your gate.
- Purchase the appropriately-sized gate. Hardware mounted gates come in various sizes, so be sure to get one that fits your space.
- Depending on your measurements, you may need to buy an extension kit as well.
- Read the manufacturer’s instructions. Before you install the gate, read the manual and make sure you follow the manufacturer’s specific directions. The details of the installation procedure may vary slightly from one brand to another.
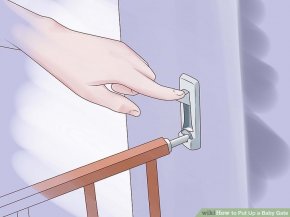
- Install the hardware mounting systems. Before you set up the gate itself, install the hardware mounting systems; this is the most important step to making sure the gate is secure. You’ll be able to see if you need to make adjustments.
- Set up the gate. Installing the gate itself is a straightforward process. The gate should mount flush to the hardware mounting system.
- Check for security. Make sure the gate is sturdy. If you have installed it at an angle on a staircase, double check that it does not float under a step; this may allow enough space for a small child to slip through.

Method 3
Installing a Gate for Wide and Irregular Areas
- Measure the area. These gates are ideal for wider spaces that require a wall-to-wall configuration. Accurate measurement is extremely important; these gates have multiple panels that combine to create a single enclosure with a versatile fit, but you need to know exactly how big your space is.
- Once you’ve measured, check to make sure the space is too big for a pressure fit or hardware mounted gate. The special gates are generally just as secure, but they cost more and have more pieces, so if it’s possible to use another kind, that’s usually your best bet.
- Purchase the appropriately-sized gate. Gates made for wide and irregular areas come in a variety of sizes and styles. Choose one that fits your measurements properly and matches the style of your home.
- Install the hardware mounting system. Make sure your measurements align with the length of the gate you’ve purchased, then install the hardware mounting system. If you mount the system to a wall, be sure that you drill and screw it onto a beam – not a hollow part of the wall. This will ensure that your gate stays securely attached.
- Set up the panels. Make sure your mounting system is flush on the wall and does not move when you pull on it, then install the panels according to the manufacturer’s instructions. Angle the panels appropriately to form a wide enclosure.
- Most gates will allow for only three panels to be placed straight. Check your manual to be sure.
Community Q&A
Ask a Question
If this question (or a similar one) is answered twice in this section, please click here to let us know.
Tips
- Always check your gate for sharp edges or pieces, and, if it is made of wood, for splinters. These could hurt your child’s hands.
- To be safe, any gate should be fairly tall: at least three quarters of your child’s height.
Warnings
- No baby gate, no matter how secure, can substitute for careful supervision. Do not leave your child unattended in areas that could be dangerous.