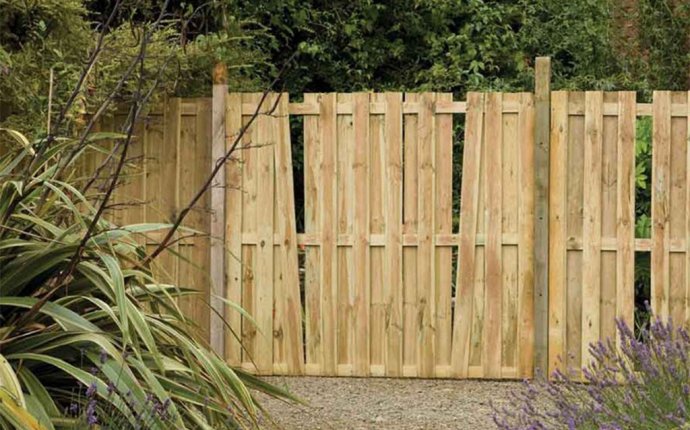
how to repair fence
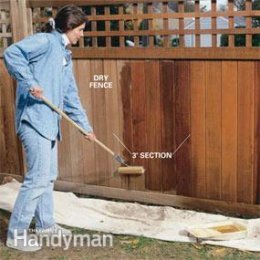
Wash
Use a power washer to clean the wood.
Repair
Fix or replace damaged pieces.
Stain
Recoat with oil stain.
When did your cedar fence lose its rich, warm glow? Who invited that discolored, shabby-looking impostor into the neighborhood? Don’t worry—underneath that thin gray skin, the glow still remains. All you have to do is remove the surface layer of aged wood cells to expose a fresh layer of wood. With a power washer, it’s as easy as washing your car. Then apply an exterior wood oil stain to preserve this new layer of wood. It’ll prolong the life of your fence to boot.
Photo 1: Start the power washer
Connect a garden hose and the power washer hose to the machine. Snap a 25-degree tip onto the end of the wand. Turn on the water to the garden hose and pull the trigger on the spray wand until water squirts out. Now start up the power washer's engine.
Photo 2: Keep the sprayer moving
 Hold the tip of the wand about 18 in. from the fence and move it the length of the boards. Pull the trigger and keep the sprayer tip moving to avoid gouging the wood. Use a variety of attack angles to strip inside corners.
Close up of sprayer tip
You'll need both a 25-degree (less aggressive) and a 15-degree (more aggressive) sprayer tip.
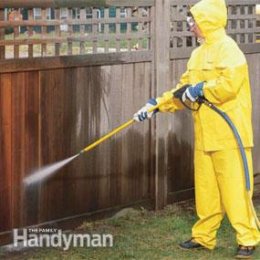
Power washers are aggressive. They’ll strip the wood as well as clean off the dirt and grime, but you can also erode the wood too deeply and ruin it. The key is to use the right sprayer tip and technique. In any case, the power washer’s spray will slightly raise and roughen the grain on smooth wood. That’s actually good—it allows more sealer to soak in and improves the finish.
Rent a power washer that operates at 1, 500 or 2, 000 psi and avoid more powerful 3, 000 or 3, 500 psi units. Be sure to get both 15- and 25-degree spray tips. Have the rental people demonstrate the washer's use. It's an easy machine to run.
To avoid damaging the pump, don't run the power washer without first filling the pump and hoses with water. To do this, attach both hoses (Photo 1), snap in a 25-degree tip, turn on the garden hose spigot and hold down the trigger on the wand until water squirts out. Release the wand trigger and start the engine. If it's hard to pull the start cord, pull the wand trigger to release the water pressure.
Clear the area along the fence by tying back plants that are growing alongside it. Wear water-repellent clothing—you will get wet from the spray.
 Start spraying with the wand tip 18 in. from the wood surface. Move in closer as you swing the tip slowly along the length of the board (Photo 2). Keep the width of the fan spray aligned across the boards. The wood's color will brighten as the surface is stripped away. Watch closely and stop stripping when no more color change occurs. You don't have to remove too much surface to expose fresh wood, and continuing to spray won't improve the color.
It takes a little practice to arrive at the proper tip distance and speed of movement, but you'll catch on fast. It's better to make two or three passes than to risk gouging the surface trying to accomplish this job in one pass. As you gain experience, you can switch to a 15-degree tip. This tip cuts more aggressively and works faster than the 25-degree tip.
Photo 3: Glue damaged pieces
 Glue split and broken pieces when the wood has dried for at least 24 hours. Apply waterproof glue and clamp or tape the pieces firmly together.
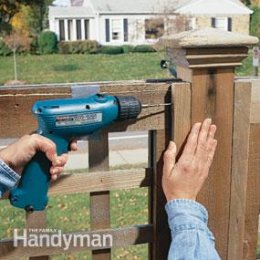
Photo 4: Tighten loose boards
Drive weather-resistant or stainless steel screws to tighten loose boards. Recess the head 1/4 in. and fill with a light-colored caulk.
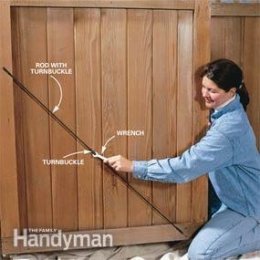
Photo 5: Straighten gates and doors
Realign sagging gates with a turnbuckle. We spray-painted the shiny turnbuckle black to make it less conspicuous.
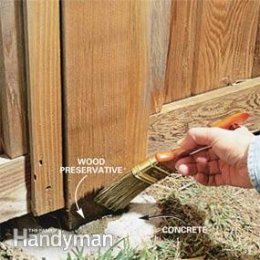
Photo 6: Apply wood preservative
Brush a wood preservative into the posts around the base to help prevent rot at this vulnerable area.
With the fence clean, it's time to fix or replace damaged boards, refasten loose boards and countersink any protruding nails. Use waterproof glue (Photo 3) to repair any split and broken boards. Drive corrosion-resistant screws (Photo 4) instead of nails to pull loose pieces tightly together. If a gate is sagging, straighten it with a turnbuckle support (Photo 5). Also coat the posts (Photo 6) where they emerge from the ground or concrete with a wood preservative. This is the area that rots first.
Photo 7: Roll a section
Roll into the dry wood a soaking coat of semitransparent stain. Coat about 3 ft. of fence, then proceed to the step shown in Photo 8.
Photo 8: Brush out the stain
Brush the stain (backbrush) into the wood grain and all corners and gaps. Brush out any runs or drips.
Photo 9: Stain all areas
Work the stain into small and tight areas with a trim roller and a 2-in. brush. One generous coat should be enough.
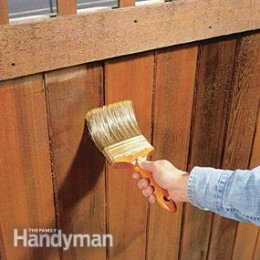
To preserve the natural color of the wood, use an exterior semitransparent oil stain. It seals the wood while allowing the grain and color variations to show through. And its pigments add an overall color tone. Make sure the stain contains ultraviolet inhibitors, which will slow down bleaching by sunlight, and a mildewcide to slow fungal growth. Look for samples on cedar at the paint store, or bring in your own piece of wood to test. A test sample is the best way to ensure a satisfactory result.
Before applying the stain, be sure the fence is dry. Allow at least 24 hours. If it's cool and humid, allow another 24 hours.