How to install a driveway gate?
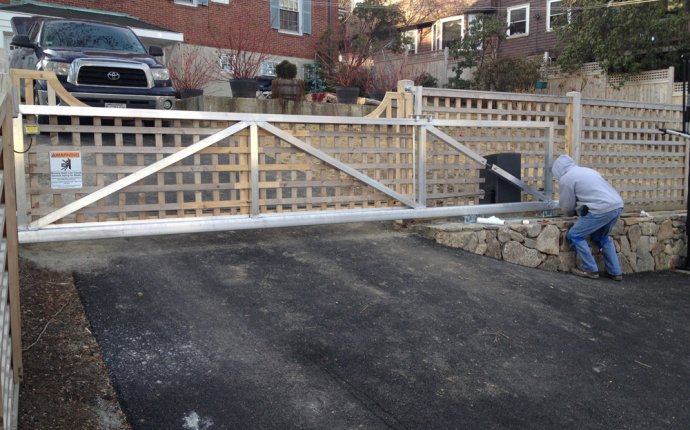
Driveway gates give a distinctive to look to your home and can add extra security. You can choose swinging or sliding driveway gates, depending on your preference and your landscaping. By far the easiest way to install these gates is to buy a gate kit, either with posts included or along with a separate post kit. That way you'll be sure to have the correct size posts and all the hardware you need.
Step 1 – Read the Manufacturer's Warranty Carefully
Some warranties will be voided if you install the gates yourself instead of hiring a professional.
Step 2 – Level the Ground
It's important to make sure that the ground where your swinging driveway gates will open is level or that it drops in the direction that the gates open. If it's uneven and goes up in elevation it can prevent your gates from opening properly. Since sliding driveway gates don't open, this isn't an issue, but you'll want to make sure that the ground doesn't go up in elevation on either side of the driveway.
Step 3 – Measure for the Posts
Read the gate manufacturer's instructions about how and where to set your posts. Each gate kit may be different, requiring a different number of inches added to the width of the gate in order to set the posts properly. The posts will also have certain markings showing where the bottom of the gate will be when everything is installed. These may need to face a certain direction, and have at least 3 inches of clearance between the markings and the ground. Be sure to check the instructions as they will vary by the gate style and size, and how the gates latch.
Step 4 – Dig Post Holes
Once you determine the measurements you need and mark where posts should be, contact your local authorities to make sure there are no underground lines in the spots you'll be digging. Once you're assured that it's safe to dig, use the post hole digger to dig both spots to the required depth. You can dig 6 inches deeper than required and fill those extra inches with concrete to prevent posts from settling and causing problems with the gate later.
Step 5 – Mount the Posts
Place one post in the hole and use a plumb-bob and level to make sure it's perfectly straight both vertically and horizontally. Then place the other post in its hole and use a laser or string level to make sure it's the same height. Also, make sure it's completely level. Double-check that the posts are the proper distance apart. The proper placement and leveling of the posts is the most important part of driveway gates installation, so spend a lot of time on this step. Allow the concrete you use to mount the posts 2 days to dry before installing the gates.
Step 6 – Install Driveway Gates According to the Manufacturer's Directions
Follow the instructions carefully, because each gate will have its own special instructions. As long as your posts were mounted correctly, you should have no problem mounting your driveway gates successfully.


