How to install Vinyl fence gate?
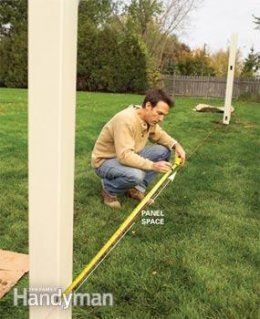
Photo 2: Locate posts
Mark the post locations on the line and then mark each posthole with a stake.
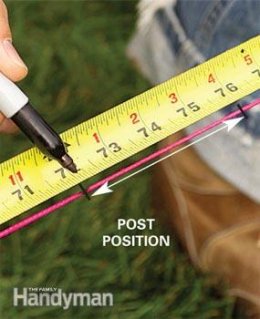
Marking posts
Make the line taut, then pull the tape measure from the corner and mark the string.
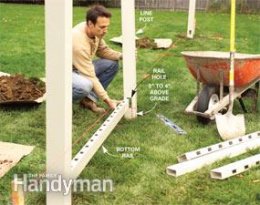
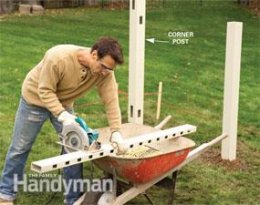
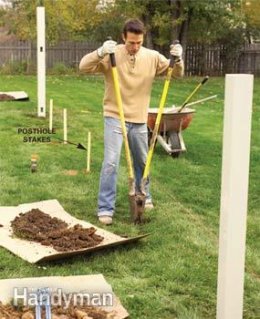
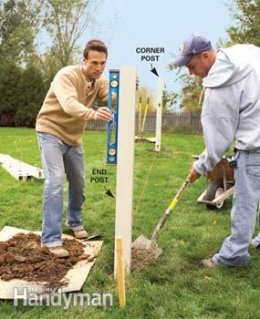
Photo 3: Dig holes
Dig 3-ft.-deep holes about 8 in. in diameter at each stake. Drop a post into each and adjust the depth to position the bottom rail 4 in. above grade.
With any fence style, set end and/or corner posts first and then fill in between them with the “line” posts. Corner posts have rail holes on adjoining sides, and end posts have holes on only one side. Line posts have rail holes on opposite sides to support fence panels on both sides.
Start by driving stakes beyond the end or corner positions, and then string a taut line between them even with the outside of the post locations. Then dig and set the end posts (Photo 1). (Read the next section for details on setting posts.) Use the rail holes on the posts to determine how deep the holes should be. (Read your fence instructions. The rail holes are usually about 4 in. above grade; see Photo 4.) You'll drive all of the posts down to the proper depth later (Photo 6), so starting a bit on the high side is best. Never try to lift posts after the concrete is added, because they'll just settle later. If you need to lift a post, add soil and pack it well before setting the post.
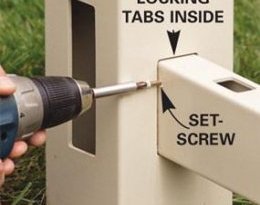
 Hold each post flush against the string and plumb in both directions as a helper fills around the post with concrete. It'll take about two 60-lb. bags of premixed concrete for each 4-in. post. Mix a fairly sloppy batch so the concrete can ooze into the large holes in the post sides to help lock the post into place. If you want to keep grass from growing around the posts, trowel mounded concrete slightly above grade so water will drain. Otherwise, stop filling the holes with concrete about 4 in. below grade and pack in soil on top of the wet concrete.
Photo 1: Lay out the fence
 Stretch a string line tightly along the proposed fence run, locate the corner posts and dig 3-ft.-deep postholes. Plumb the posts and fill the holes with concrete.
Start by picking up a fence permit application from the local building inspections department, along with local fence regulations. They will include setback requirements from your property lines to the fence and maximum heights. These details will likely vary for front and backyard fences and can even be different for houses on corners or busy streets.
If you live in a “planned” community or subdivision, you may also have to submit information to a planning committee. Follow all regulations to the letter. Otherwise you may wind up tearing out and moving your fence.
Draw a dimensioned sketch of your yard that clearly shows your property lines. Then add your proposed fence outline, heights, distances from property lines and gate locations. If you're not sure of your property lines, hire a surveyor to have them marked.
Take photos of each side of your yard, focusing especially on sloped areas and anything that will interrupt your fence, like buildings, trees or retaining walls (and mark their locations on your sketch too). The photos will also help you and the supplier plan and choose a fence that'll meet local ordinances, so have them with you. With the fence style chosen and the dimensions and layout in hand, apply for and receive your permit before ordering the materials.
 Plan an accessible spot for a removable section of fence so you can get large equipment or a pickup truck into the yard if it's needed in the future. The fence supplier can provide special hardware just for this.
Ordering Fences Online
Type “vinyl fences” into any search engine and you'll get about 250, 000 results! With so many companies offering fence kits online, the selection is a bit daunting, but you can buy your whole fence online and have it delivered directly to your house—with free shipping if the purchase is over a certain amount. It's an option for those who live far from large cities. But do plenty of research. Some companies will help you with your order if you supply a sketch. Others expect you to fill out your own materials list. Doable, but you'd better be extra careful in figuring out exactly what you need. Forgotten, missing or damaged pieces will cause delays and extra shipping charges. Although every Internet source I studied had a phone number you could call for help, go with a local firm if you can. You'll be able to see the product, and it helps to sit down with someone to work out the materials list.
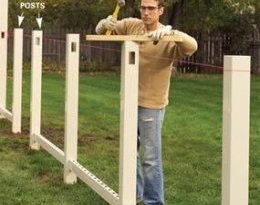
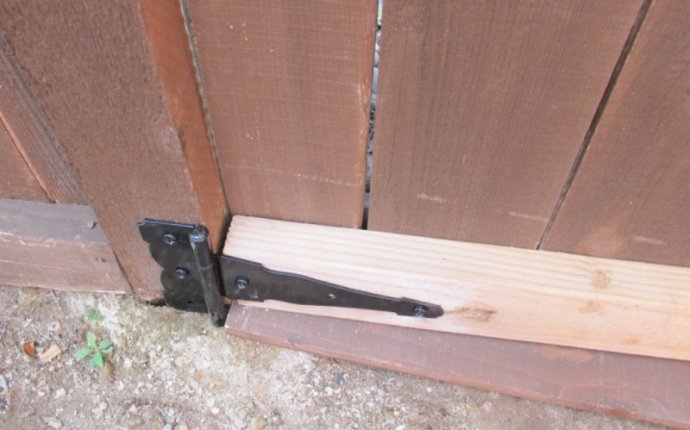
Photo 4: Plumb posts
Drop a post into place and snap in the bottom rail. Then position it against the string line, plumb it and add concrete.